


First Steps
Step 1: Create Your Account
- After purchasing LiveSwitch make sure to click the “Get Started” button to finish setting up your account. Also look out for a welcome email with additional information.
- Don’t forget to bookmark app.contact.liveswitch.com to log in next time. The email address used to check out will be the email you use to log back in next time and will be the main admin account.
Step 2: Customize Your Account
After account setup is complete, you can customize your account for your organization.
- Navigate to “Settings” in the left-hand menu.
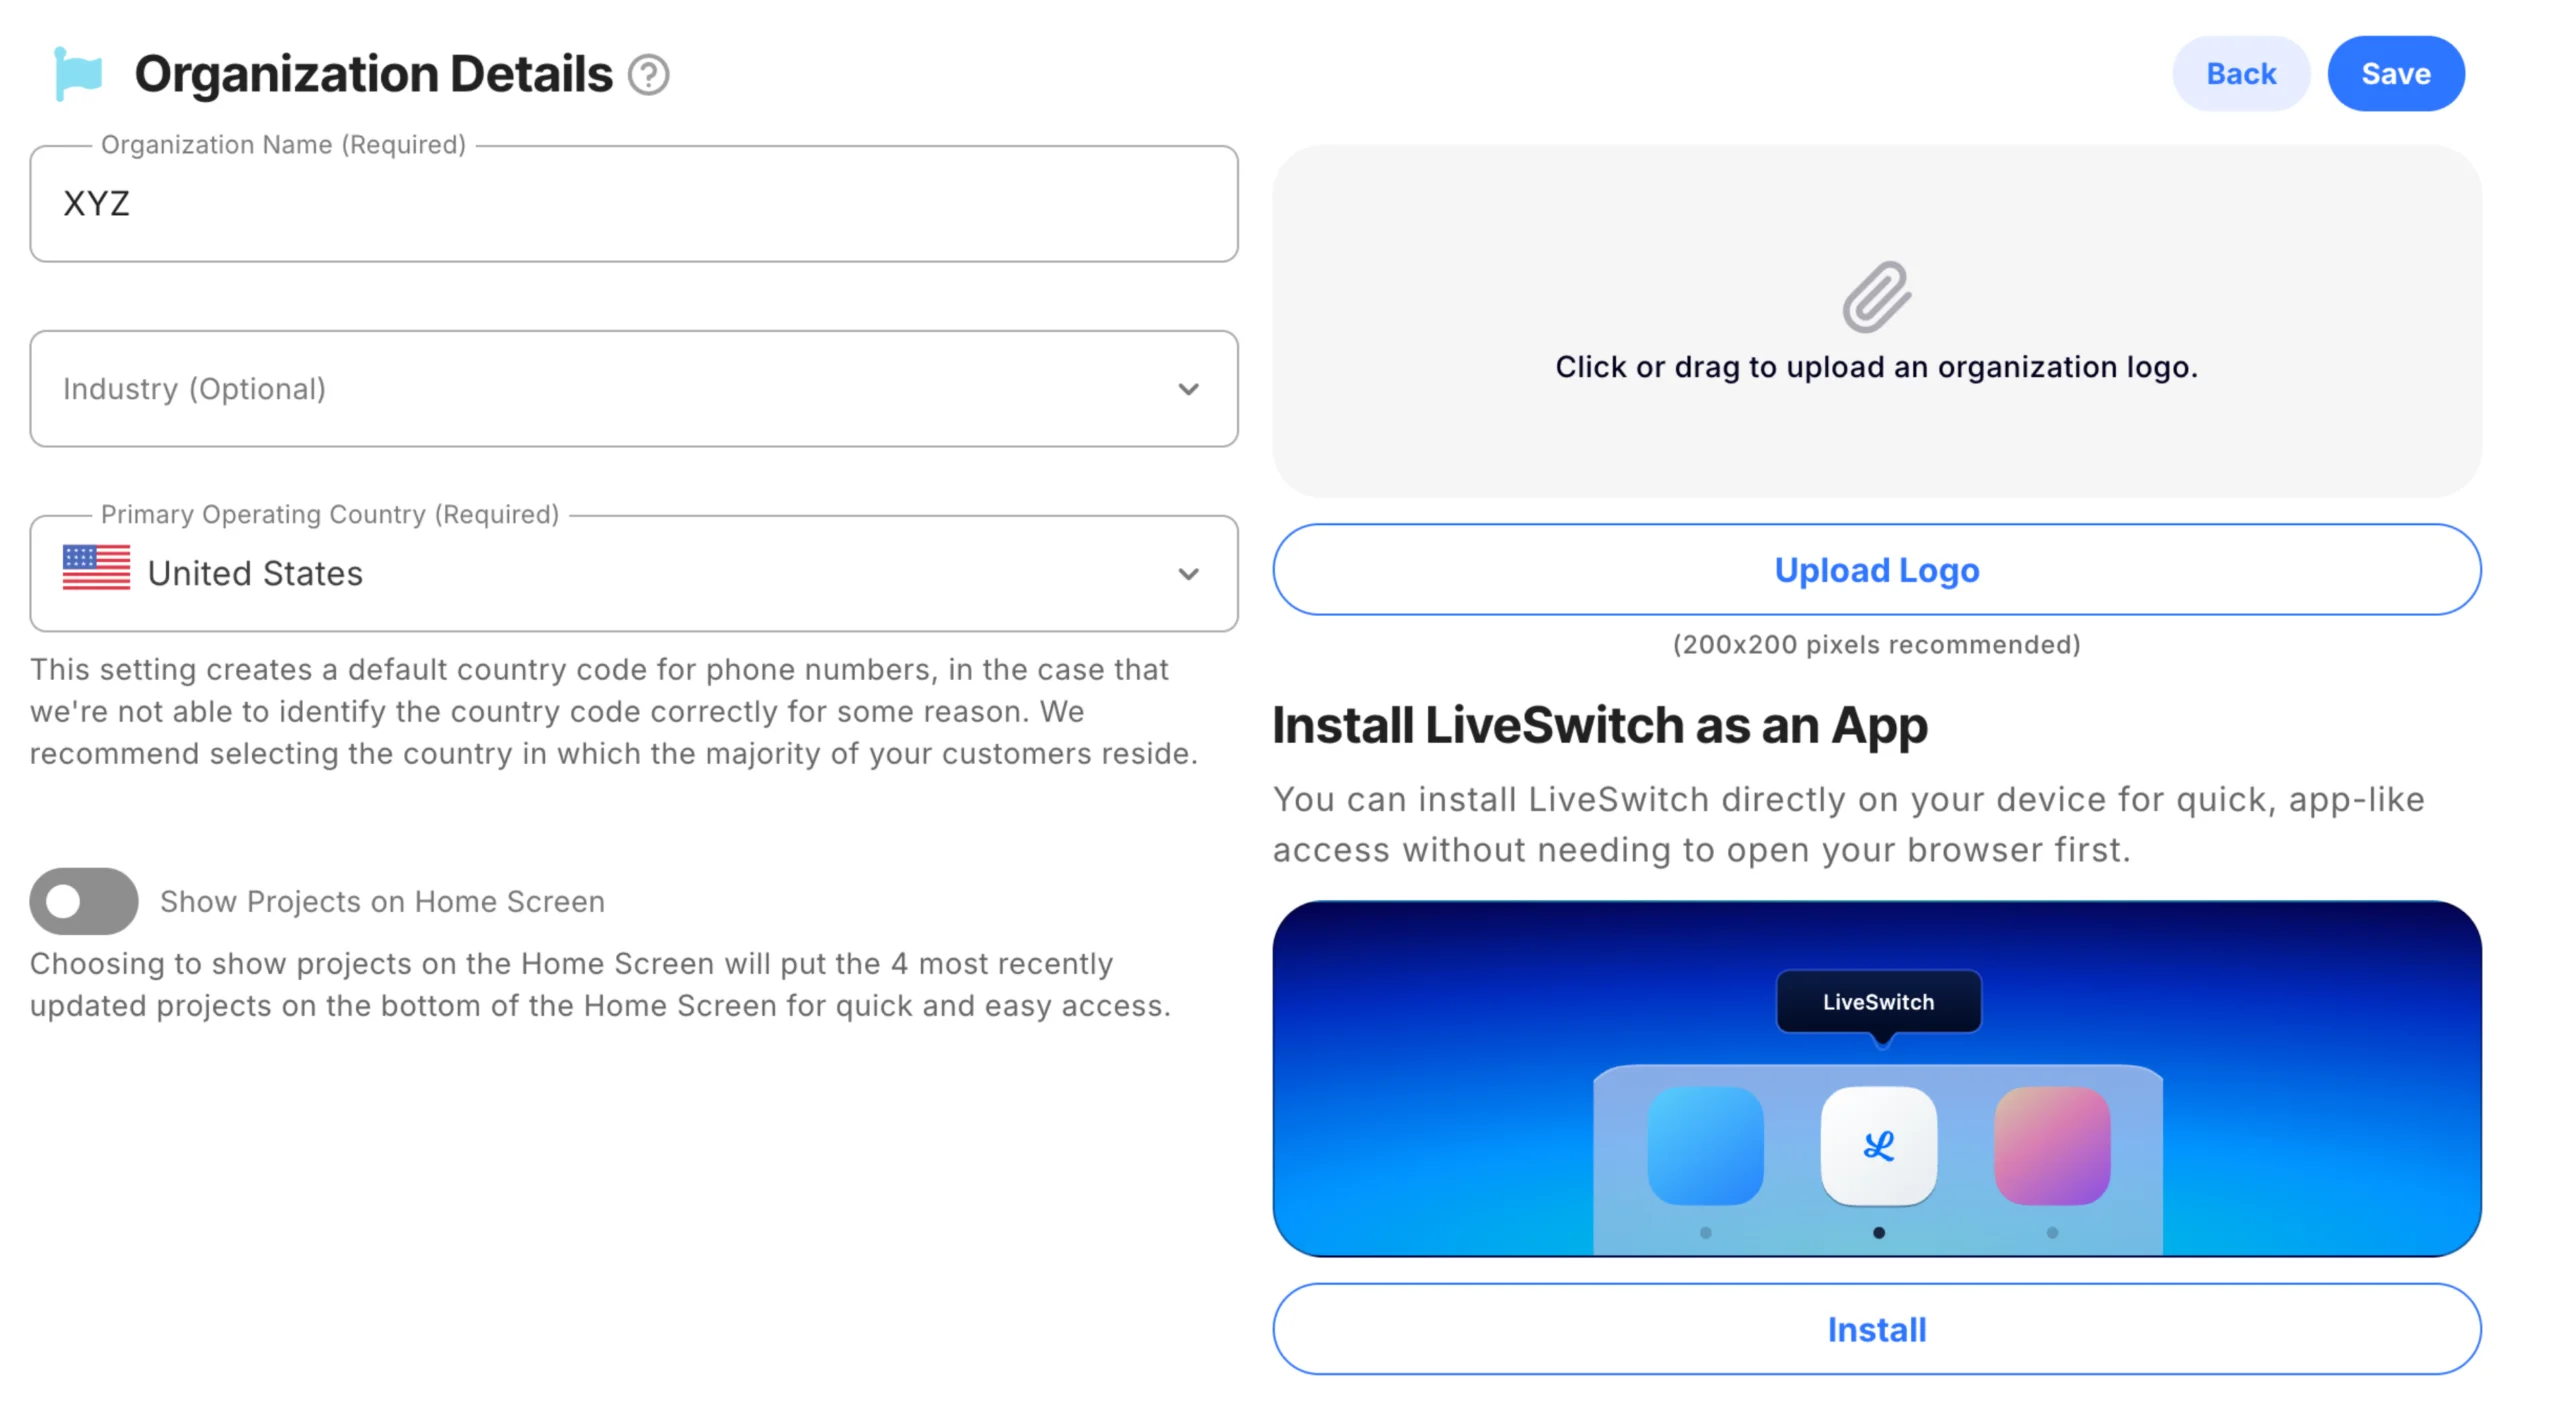
- Confirm your “Organization Name” is displayed correctly and add your organization logo by clicking “Upload Logo”. Logos should be a PNG file and 200 x 200 pixels. Choose the country where most of your customers are located.
- Add virtual backgrounds on live calls by enabling the Virtual Background option under the Settings tab. Once turned on, the selected background—either from the preloaded options or your own uploaded image—will automatically apply to all future group sessions, allowing for a consistent and professional appearance on every call.
Virtual Background Image Guidelines
- To ensure the best visual quality during live calls, please use virtual background images with the following recommended dimensions:
- 1000 x 1000 px (Square)
- 500 x 500 px (Square)
- 640 x 480 px (Standard 4:3 ratio —not completely square, but supported)
Tip: Use high-resolution images to maintain a clean and professional appearance during calls.
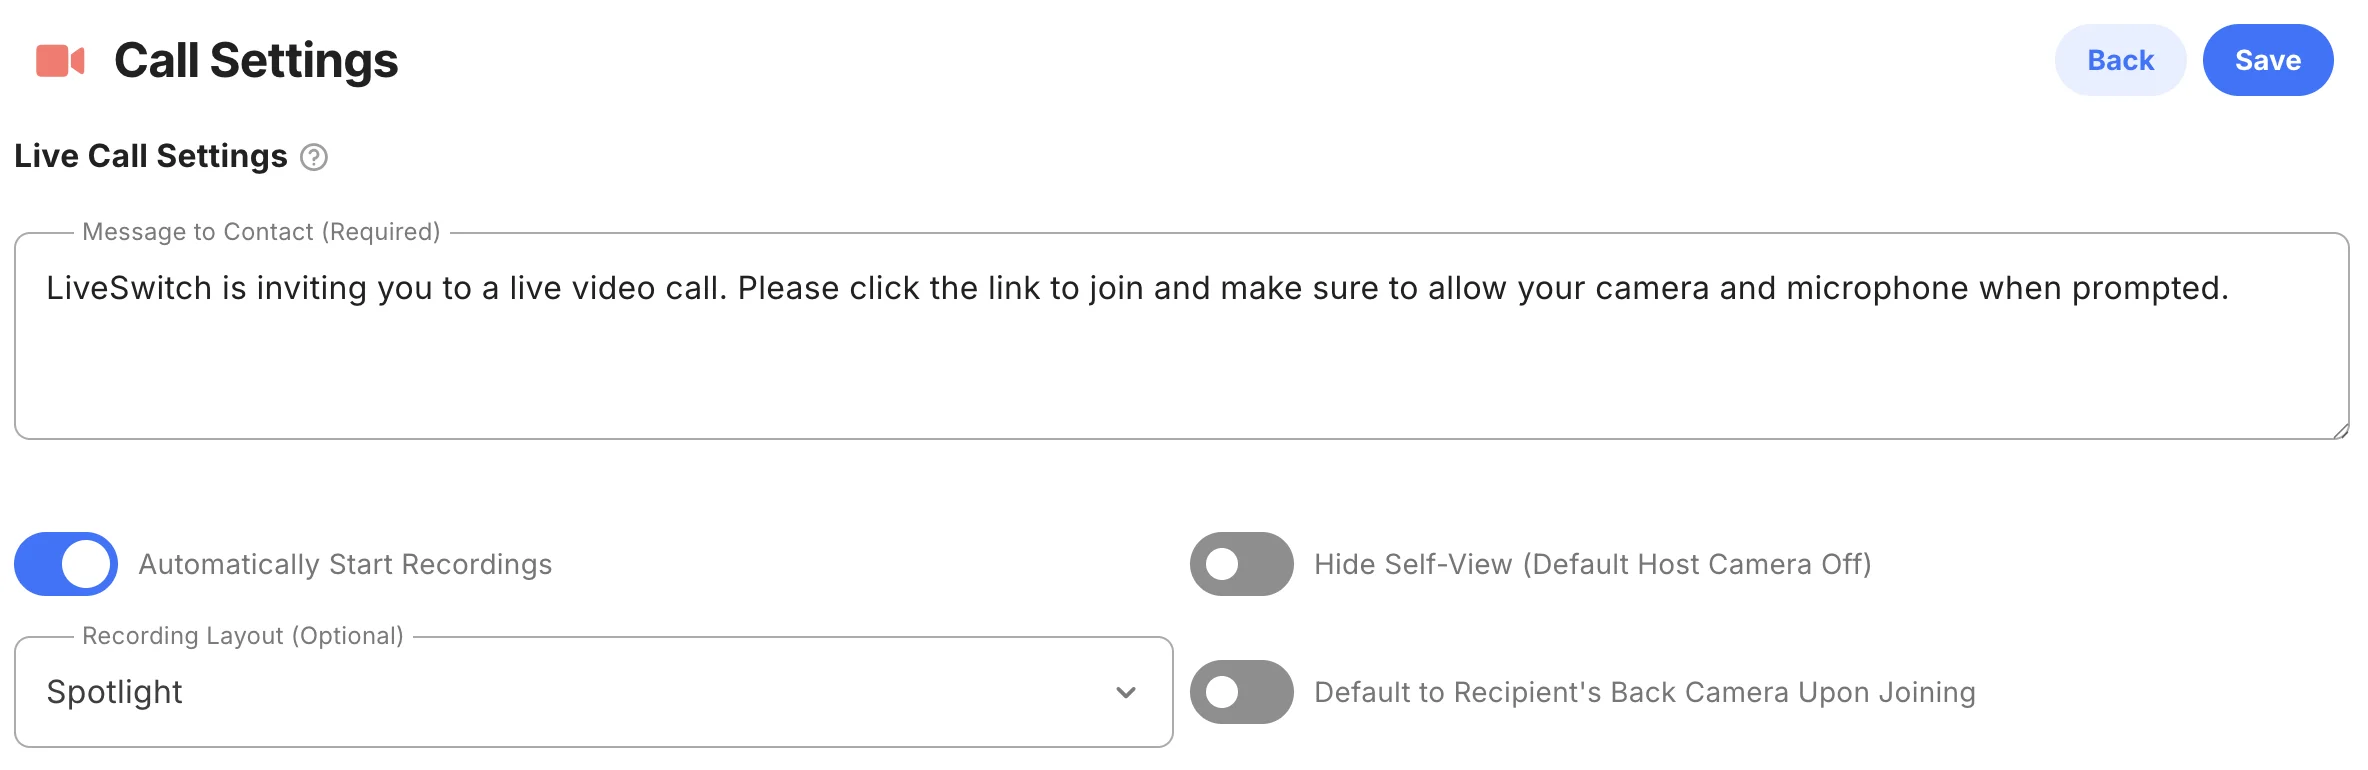
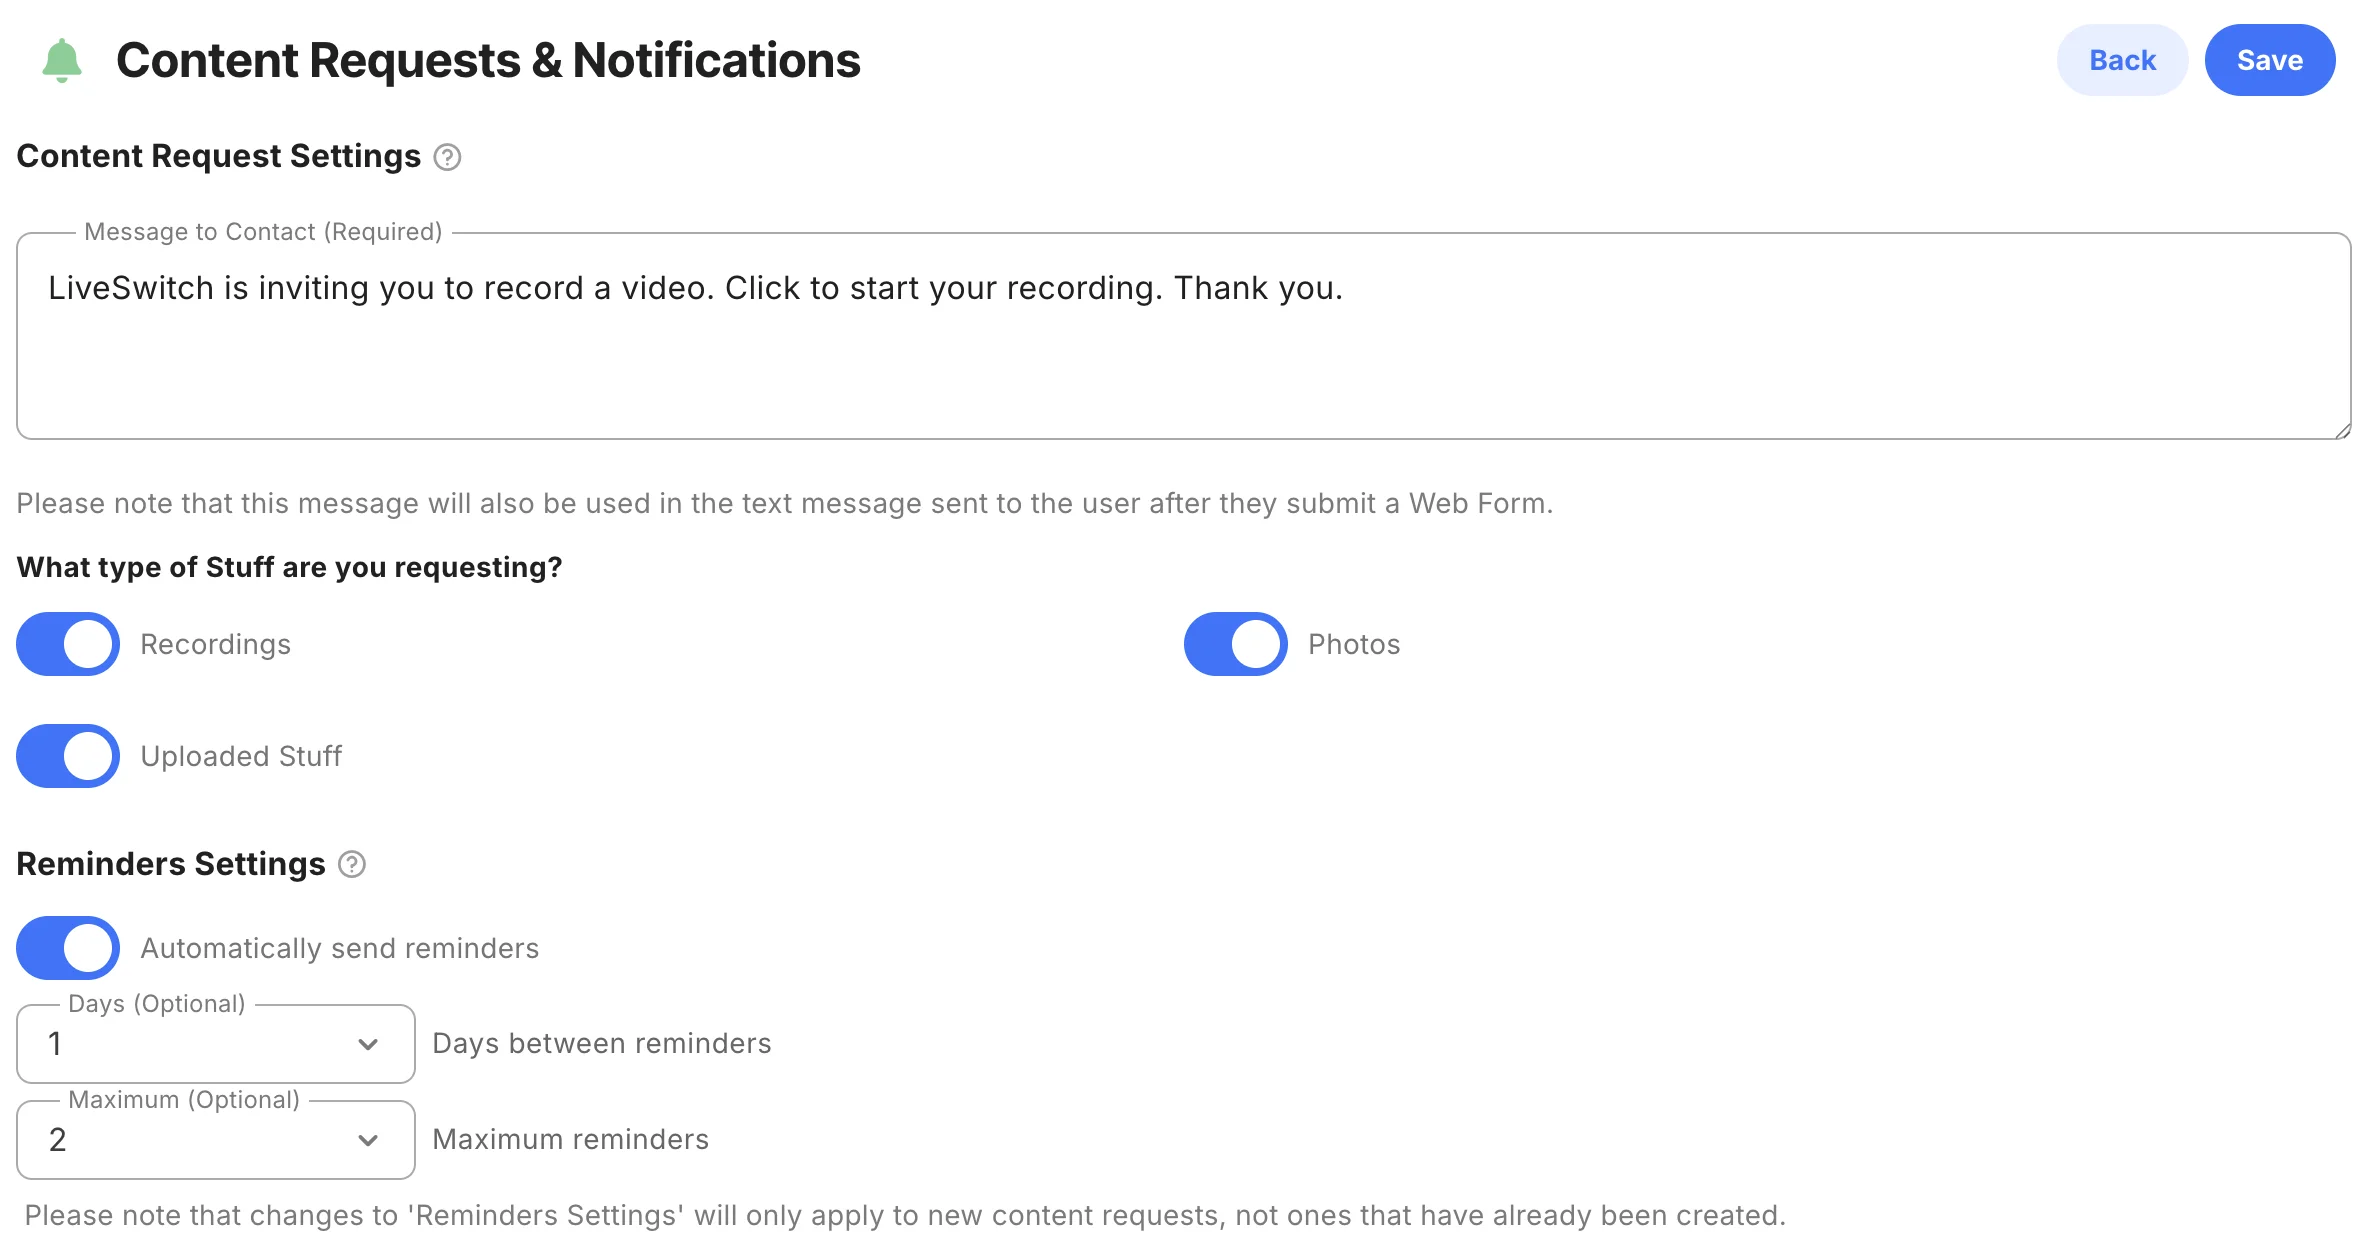
- Update the “Live Call Settings” and “Recording Request Settings” as needed. This will be the message sent to customers when sending them a text or email inviting them to join a call or record a video. Make sure to click the “Save” button at the top after making any changes to your settings.
- When you’re setting up a live call, you can choose how the recording will look using the Recording Layout setting. Spotlight (Default): This layout puts the main focus on the person you’re talking to. So if you’re the host, the recording will mostly show the guest or remote participant clearly.
- Side by Side: This layout shows everyone on the call equally. Both you and the other person will appear next to each other in the video, making it feel more like a face-to-face conversation.
- Adjust the “Recording Request Settings” to send automatic reminders by toggling the button and selecting the frequency.
- Create your “Web Form & QR Code” by clicking on “Create New Form”.
- Add a Title, Notes (Internal only) and the Headline. Your customers will see the headline at the top of the form when they access it. This is a great area to add instructions for the form.
- Use the “Add a New Field” button to add or remove fields from your form.
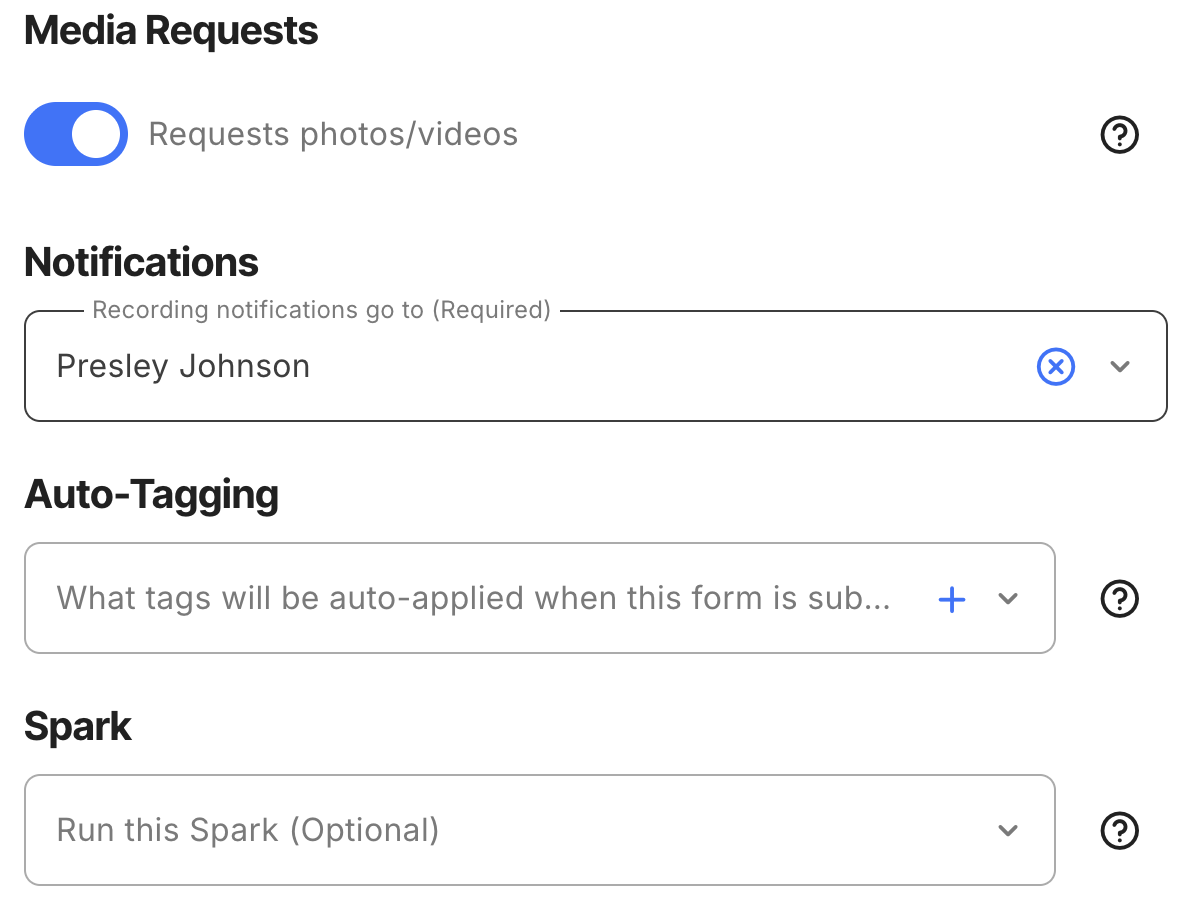
- Select who from your team should receive the notifications.
- Once your form is ready click “Create Form” to generate the QR code and link for use.
- The web form is accessed by the customer via the link displayed below. Once copied, this link can be sent via email or text. It may also be embedded into a web site by a webmaster. Additionally, the unique QR Code allows customers to use their mobile phone camera to access the web form. The QR code can be printed and placed in a physical location, or downloaded and embedded into a website by a webmaster.

- Instructions for adding a form to your website
- Notification and Other Settings: Select which team member should receive responses from customers for system generated emails and the be alerted when a new web form with a recording is submitted.
Step 3: Add Users
- Navigate to the “Users” section in the top right corner under your profile
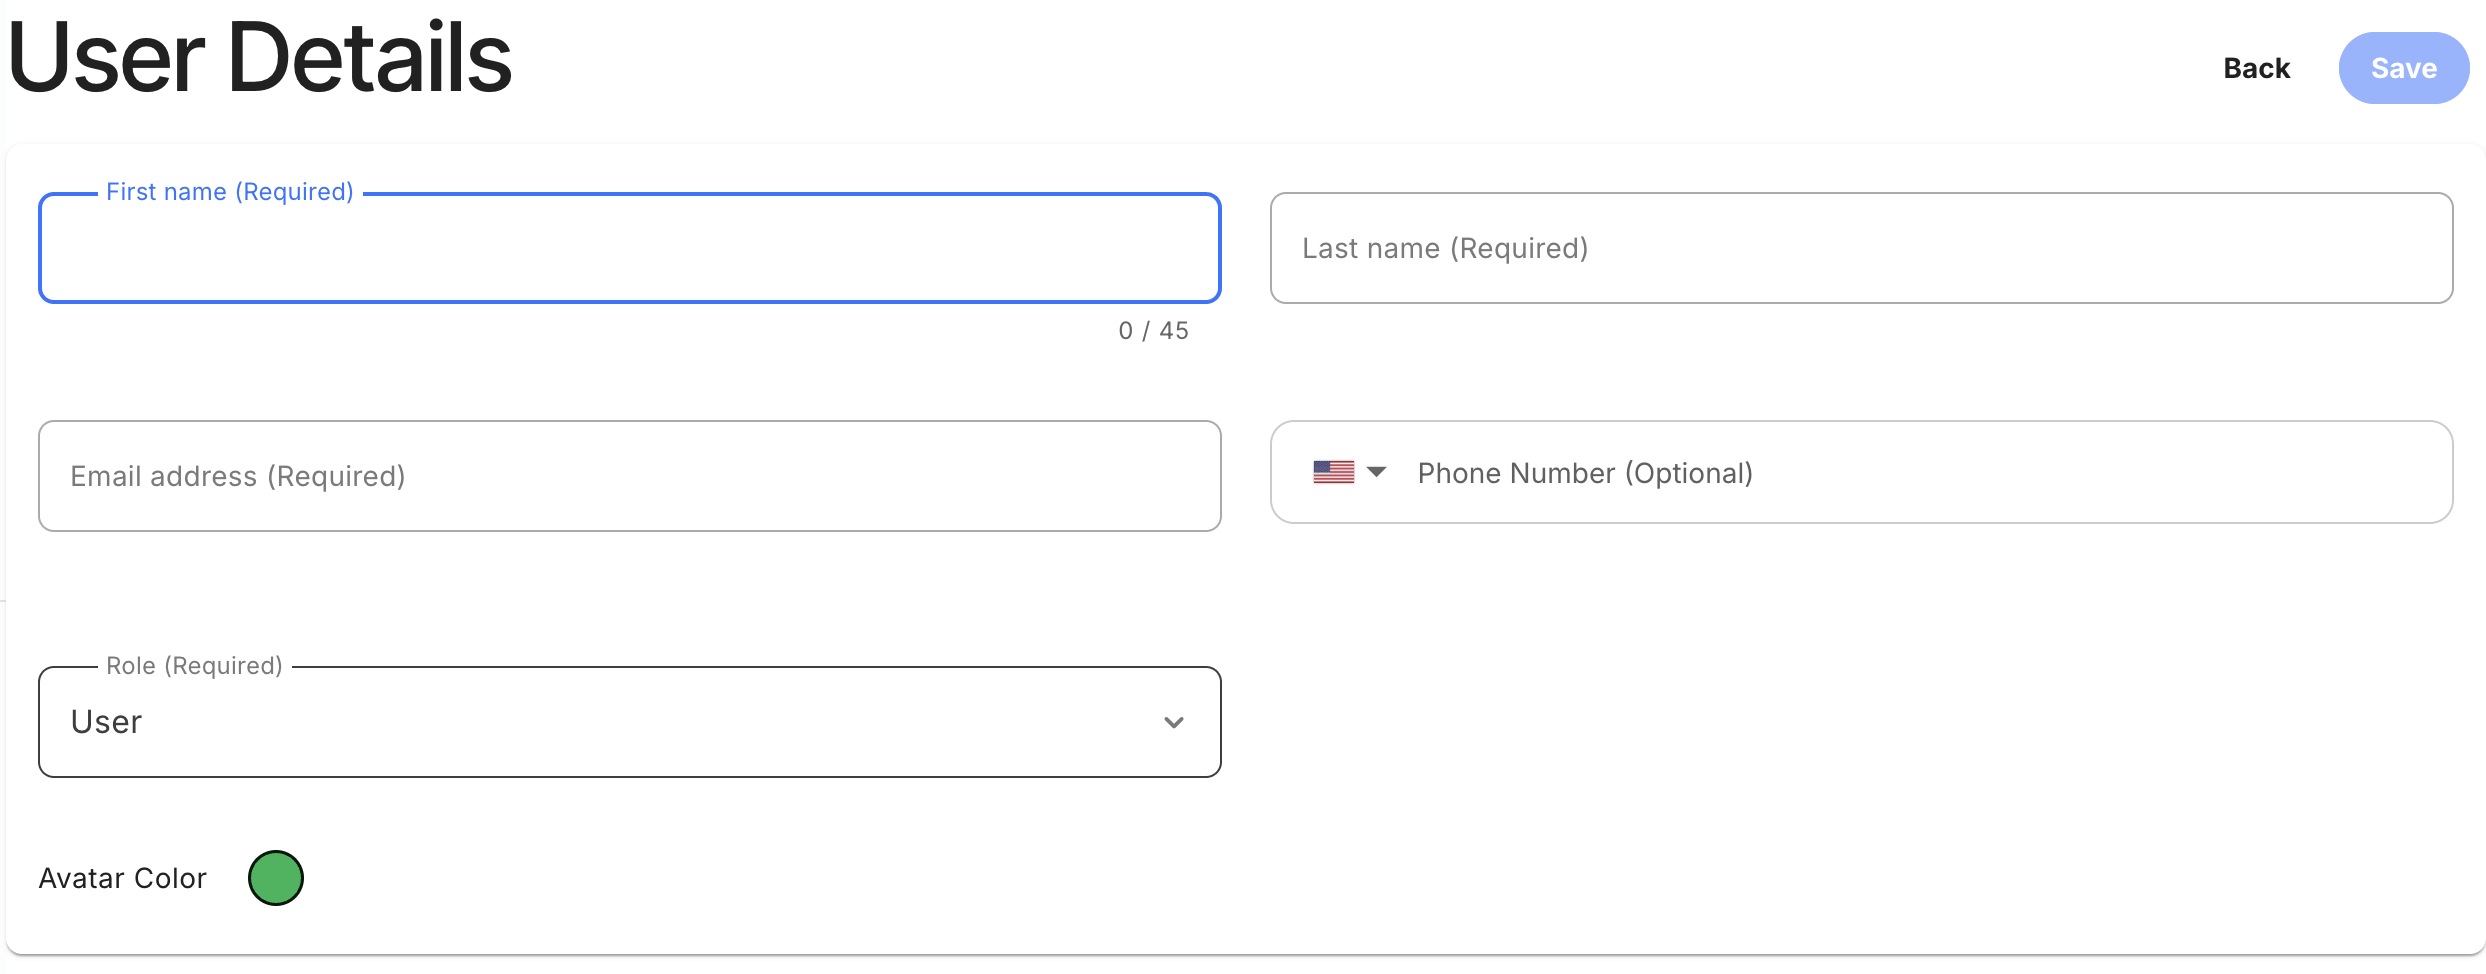
- Click the blue “Add User” button

- Fill in each user’s information “First Name, Last Name, Email & User Role”
- Click “Save”
- New users will receive an email invitation to sign in and select a password.** Please note additional charges may apply if you have exceeded your user count. **
- Now that your account has been set up you can begin using all the features of LiveSwitch from the Home page.
Using LiveSwitch
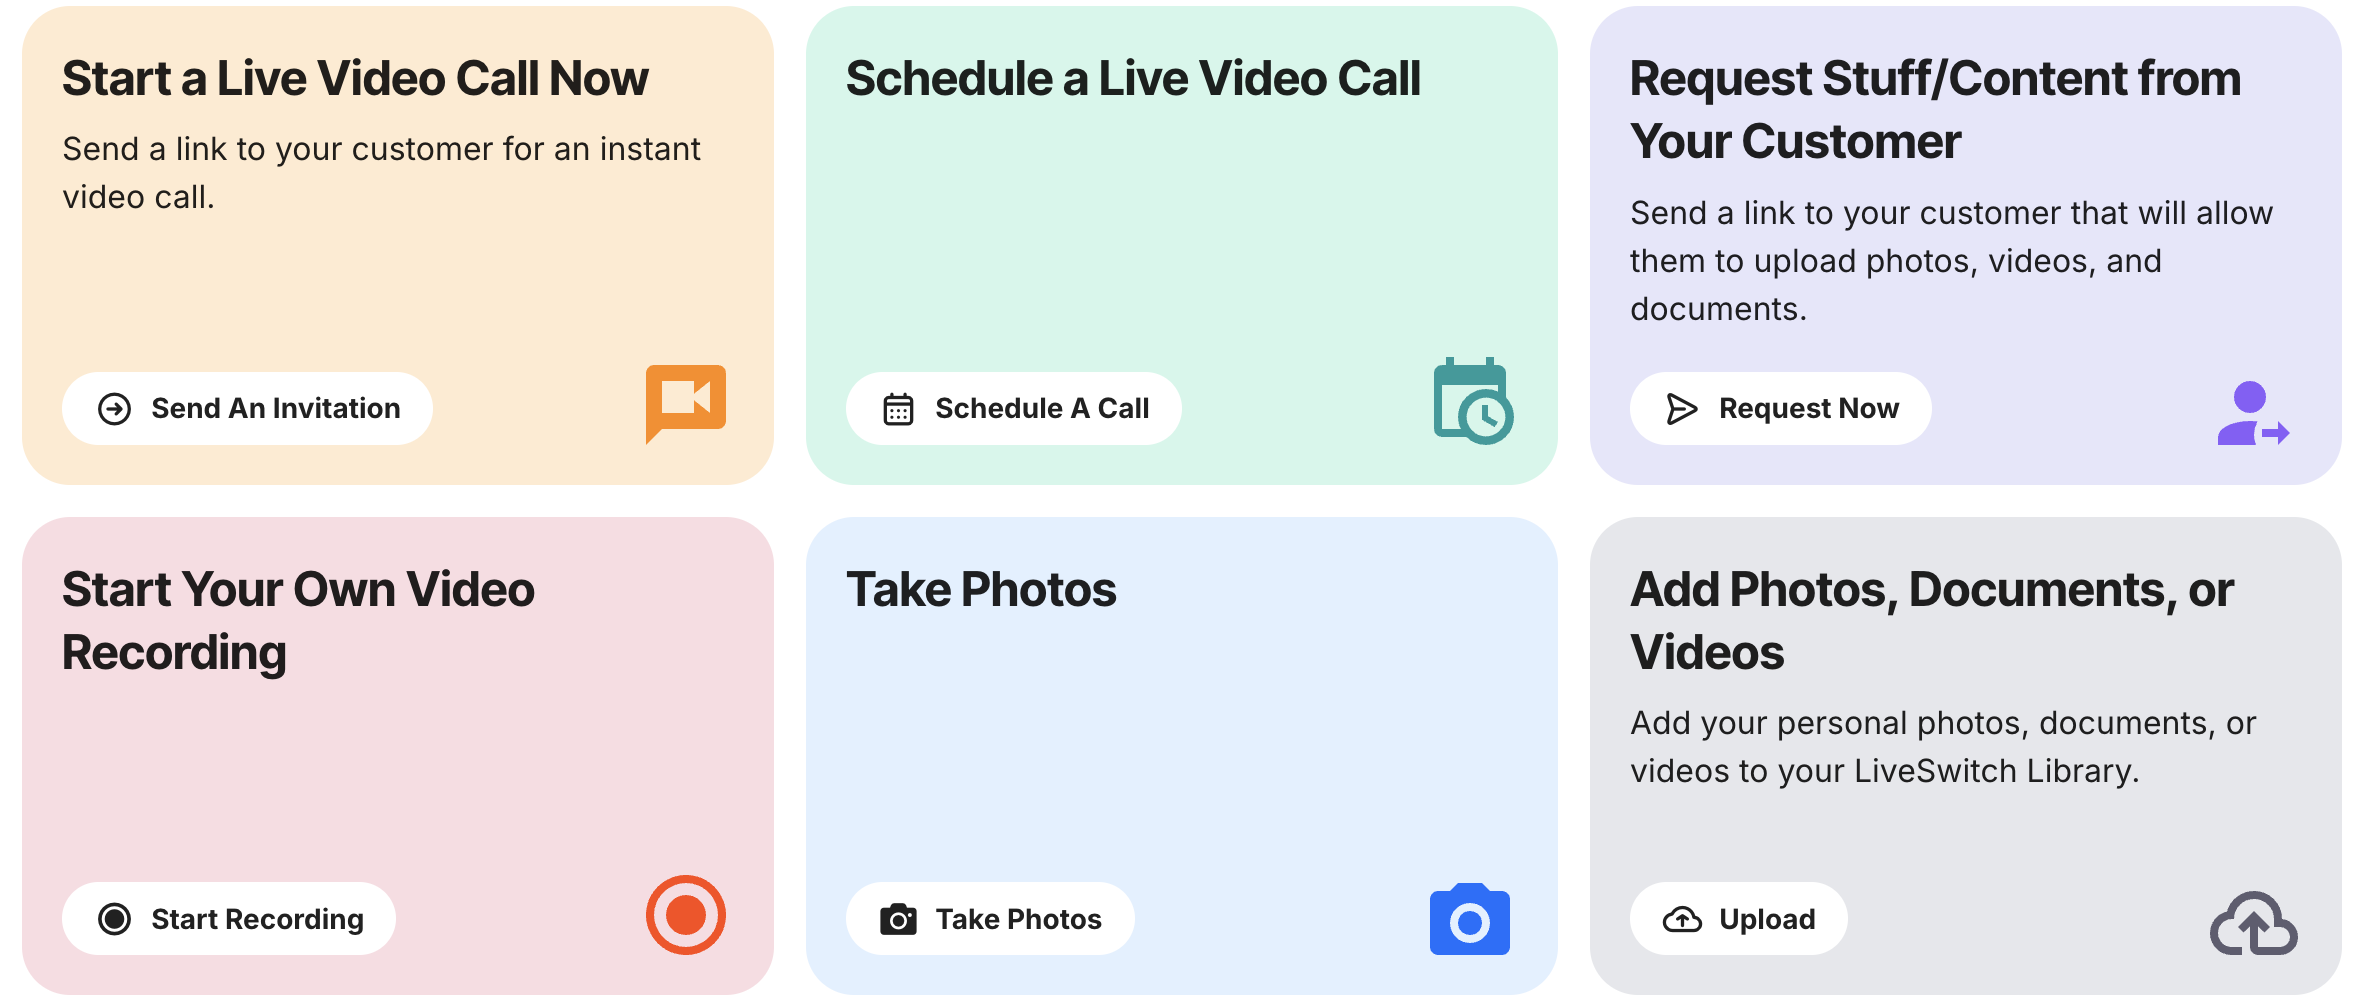
Once you’ve set up your account, the options to send customers a video link will be available on the Home Dashboard. There are six options for conducting live video calls, requesting recordings or adding photos and documents.
- Start a Live Video With a Customer: Click “Send an Invite” if you wish to begin a live call with a customer immediately
- Schedule a Live Video Call: Click “Schedule a Call” if you would like to schedule a live call with a customer in the future
- Start Your Own Video Recording: Click “Start a Recording” if you are onsite with a customer or have a need to record something for internal purposes.
- Request Stuff/Content from your Customer: Click “Request Now” if you do not need to connect live and wish to send your customer a link to make a recording at their convenience. This link can be used multiple times if needed.
- Take Photos: Click “Try Now” to instantly take photos for new or existing customers or projects.
- Upload from the Home Screen: Add videos directly from the LiveSwitch home screen using “Add Photos, Documents or Videos,” or upload within any session or project.
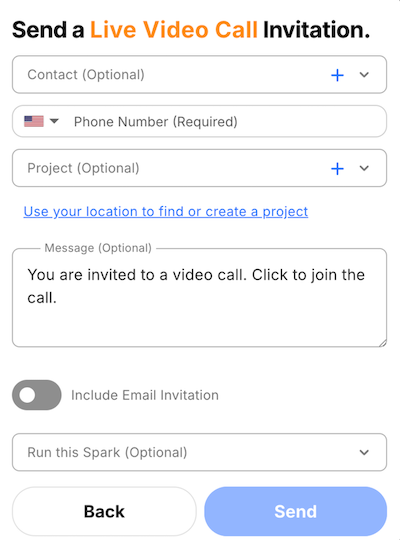
Send Live Call Links
On the pop up module after selecting the type of video call you wish to have, enter the customer’s “Phone Number” and “Contact Name” then click SEND or SCHEDULE to send the video link to the customer. If scheduling a call make sure to select the day and time. You also have the option to change the default message that is sent with the link, include an email invitation or share with a team member. The call will instantly start in a new tab.
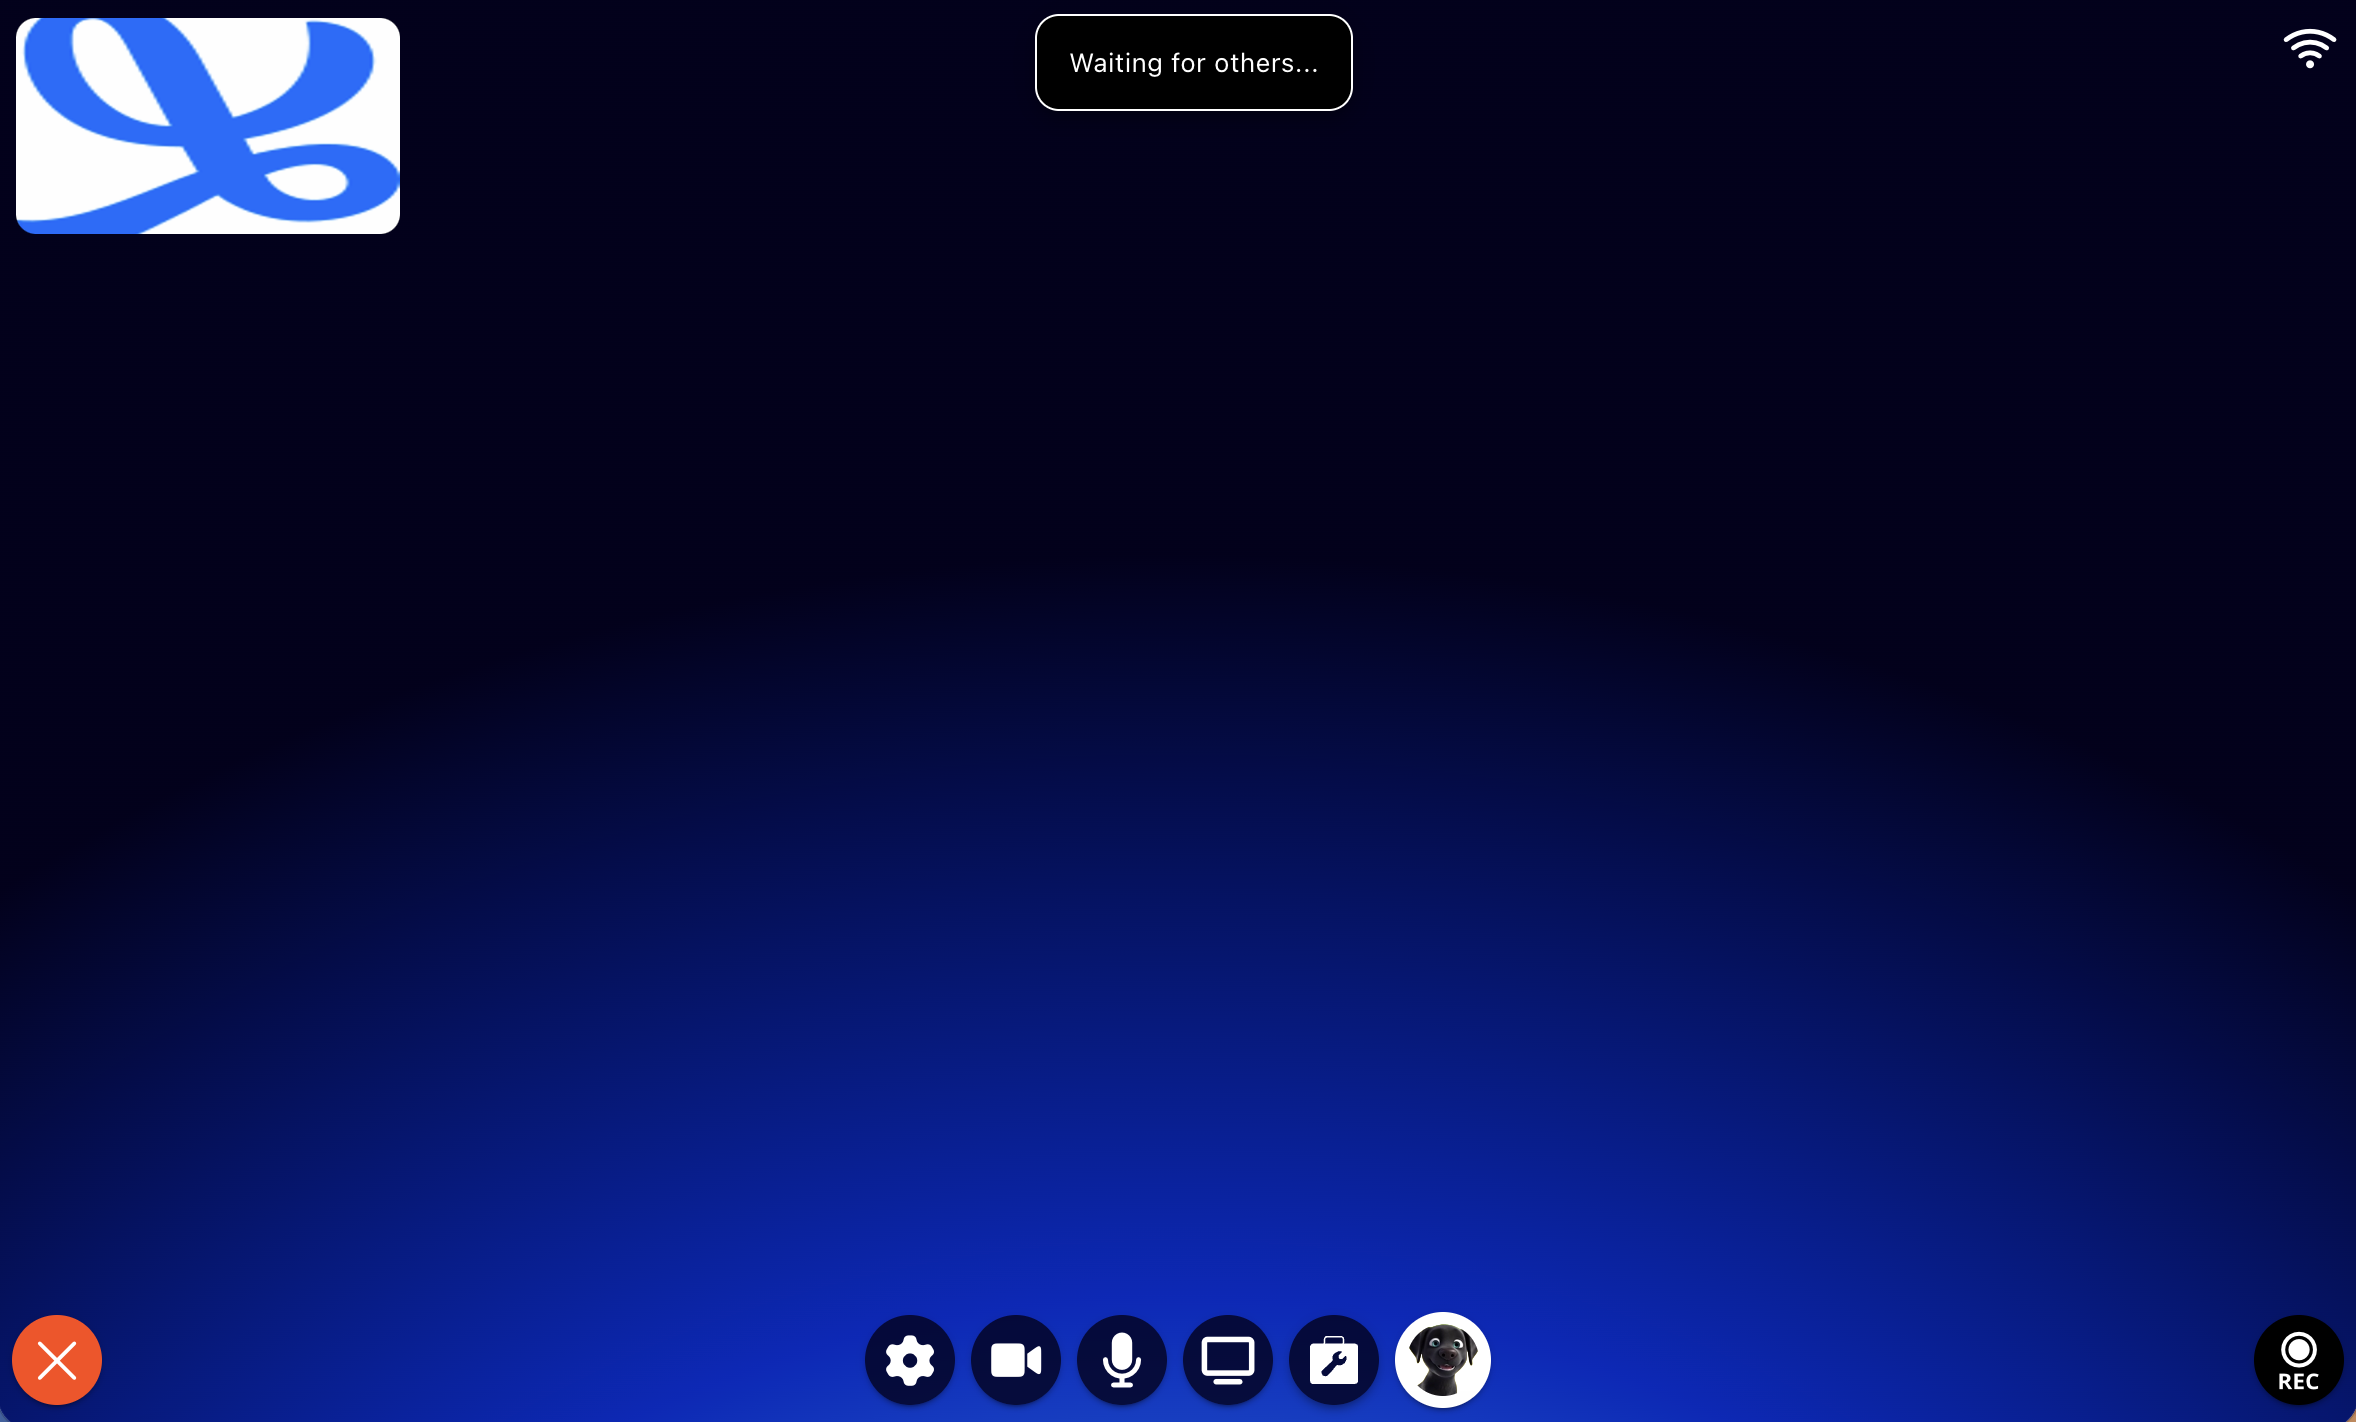
Start the call
For the Live Call click “JOIN” after sending the customer their link. Your video chat begins as soon as your customer joins. Your video tile will be displayed in the lower right corner of your device, and once your customer joins the call they will be full-screen.
What your customer sees
When you send your LIVE CONVERSATION text link, your customer is immediately notified with a text message. You can easily customize the message using the notification template.
Once your customer clicks the link they will be prompted to join your video call by accessing their microphone and camera. Make sure to tell them to click ALLOW.
After the customer clicks ‘Allow’ they will enter the call with you, and voila, you are good to go. It’s that easy.
In-Call laser pointer tool
Easily guide your customers’ attention during live calls using the Laser Pointer feature, available right within your in-call toolbox.
This tool allows you to clearly highlight and point out specific areas on the screen, making explanations and walkthroughs much simpler during live sessions.

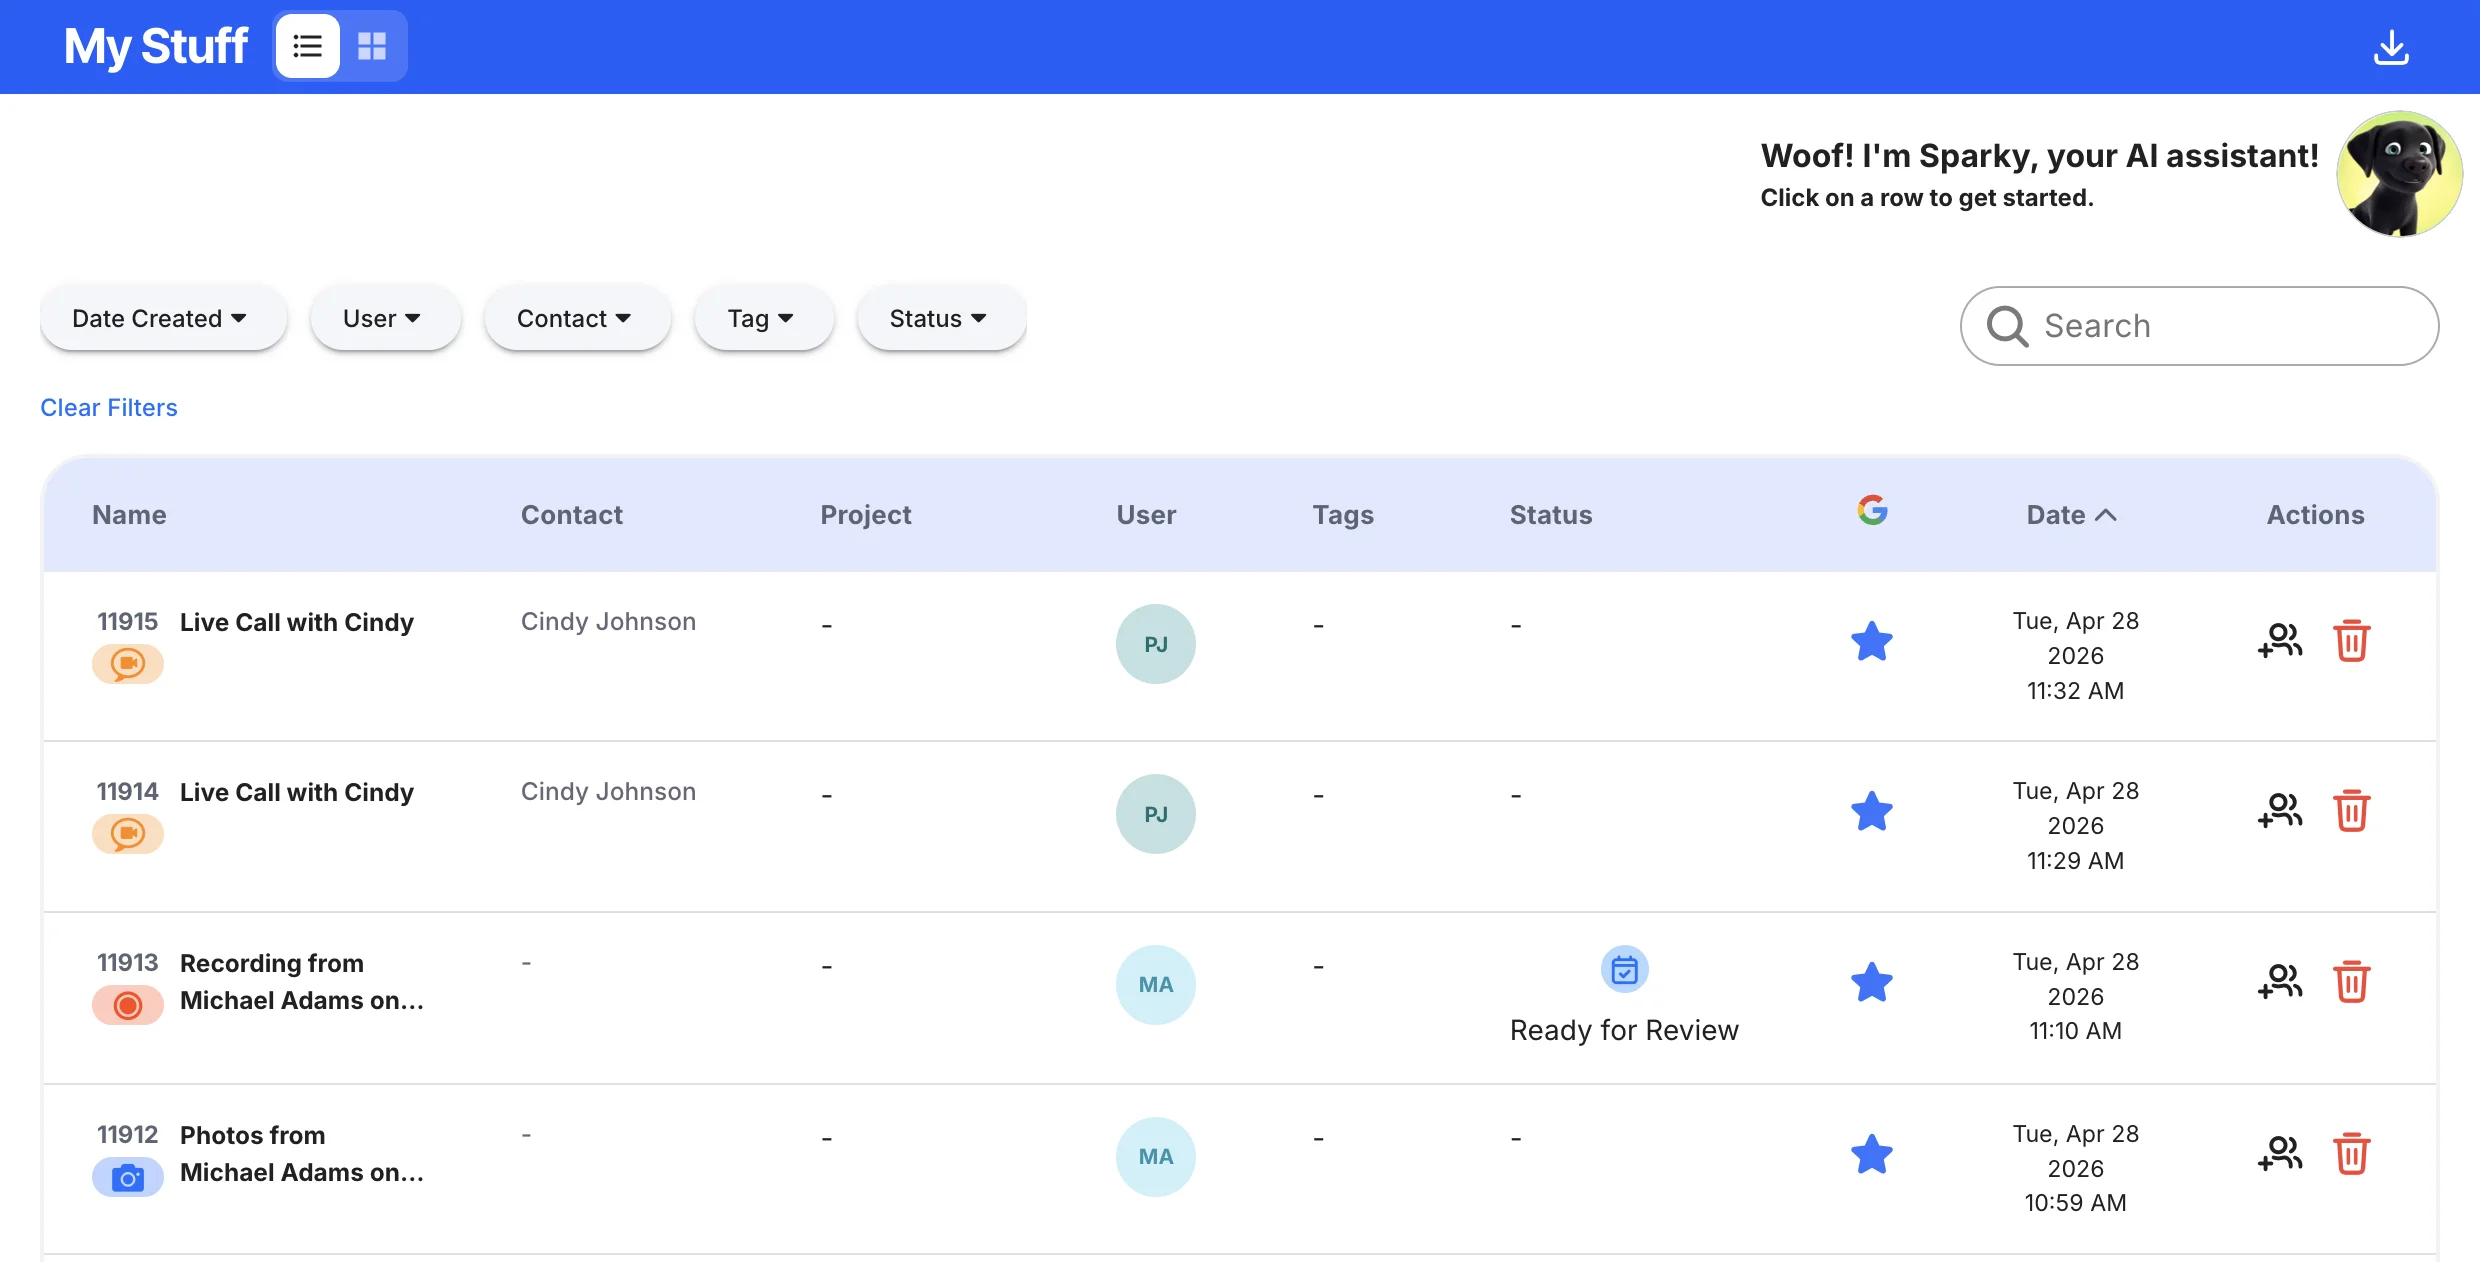
Sessions/My Stuff
From this section you are able to review all recordings and activity.
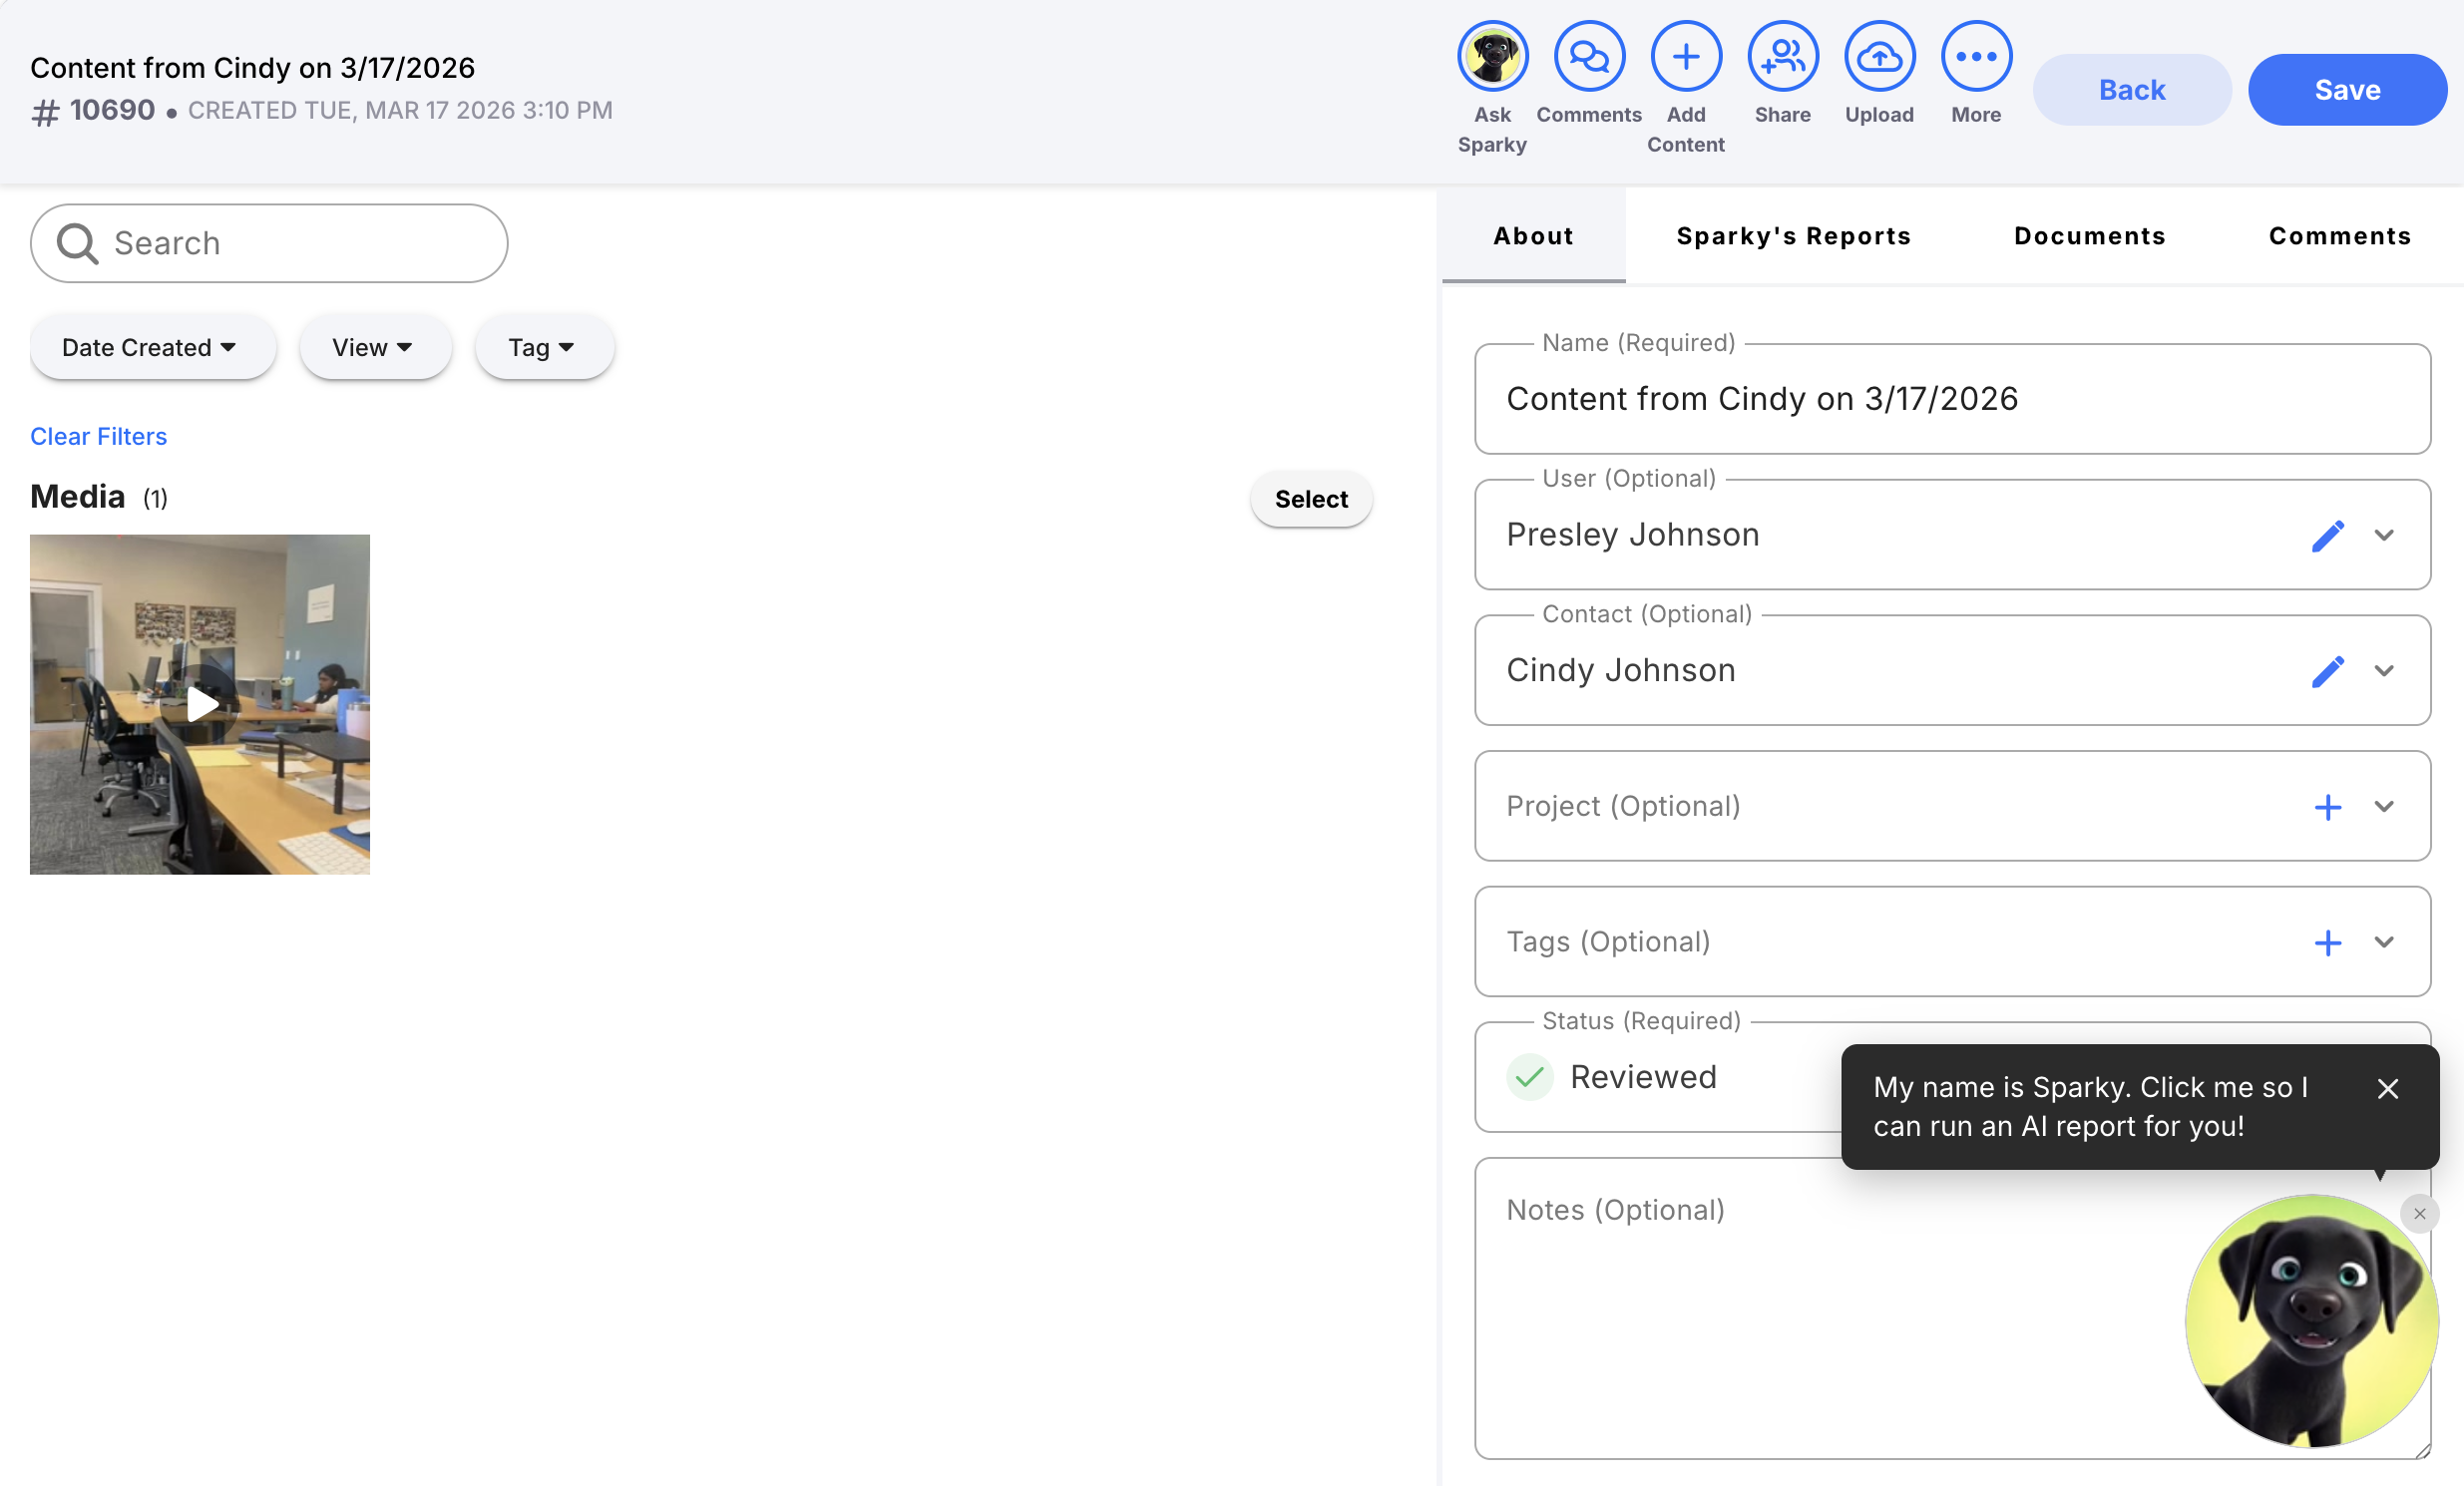
To review more details about a specific session simply click within the row and you will be taken to another page with more detailed information as well as access to the recording if one was made.
You can change the session name, add notes, tags, take snapshots, upload additional videos to any record as well as share or download the recordings.
Projects
Projects allows you to organize video sessions, snapshots and documents all in one place.
How to Create New Projects
- Click on the “Projects” tab on the left hand menu and click the blue button “Add Project”.
- Initiate a LiveSwitch Session from the FAB icon in the lower right corner and type in a new project name and click the plus sign followed by “Create”.
- Start a new LiveSwitch Session from the Home page and type in a new project name and click the plus sign followed by “Create”.
- From a Sessions page click into the Project box and type in a new project name and click the plus sign followed by “Create”.
- All projects you create will show in the dropdown for you to add sessions and other content too.

Project Features
- Track each project’s status: Not Started, In Progress, Completed
- Add the project’s Address
- Add internal users to the project
- Share the project with others or copy the direct link to the project
- Add more content such as photos, documents & videos
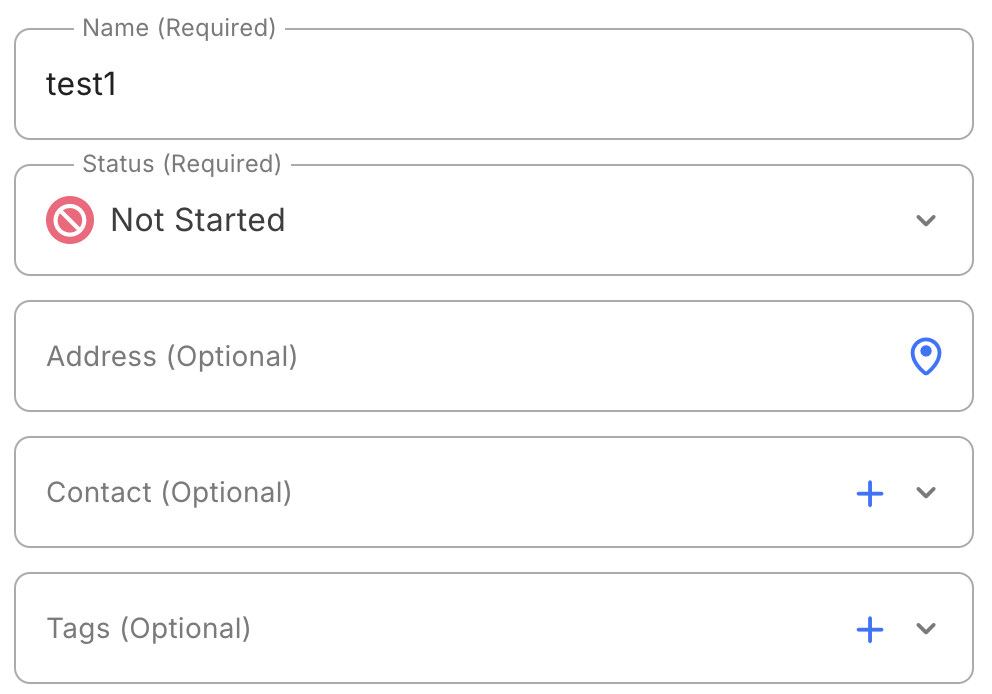
Image Annotation Tools
The Image Annotation feature in both Sessions and Projects, giving you more flexibility when marking up images. Along with existing tools, you can now:
- Add Text Overlays: Easily insert text to label specific areas or add important notes directly on images.
- Customize Colors: Choose from a full range of color options to make your annotations clear and visually tailored to your needs.
They will help you document and communicate more effectively—both during and after customer interactions.

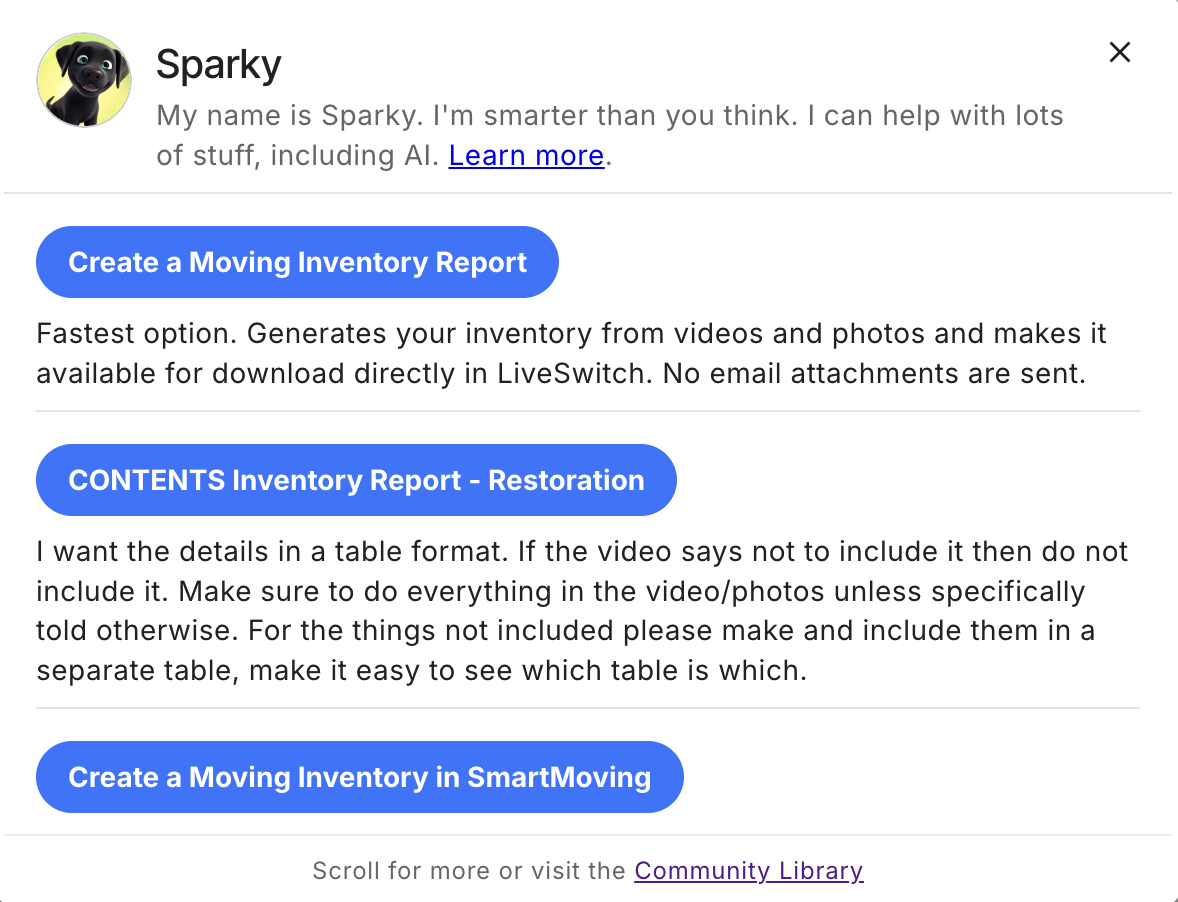
Sparky: Your AI Assistant
Sparky, AI assistant designed to help you create reports from your content in a snap. Sparky analyzes videos and photos to generate reports based on your requests.
To get you started, we’ve included four helpful prompt templates.
- Help Me Communicate With The Customer: Get a report to share.
- Create a Summary: Get a quick overview of the content.
- Tell Me The Size of This Job: Receive an estimate of the project’s scope.
- Create a Moving Inventory Report: Generate an itemized list for a move.
- Tips & Quick Access: Find new “Tips and Tricks” in the “Create new Prompt” menu and access Sparky AI faster from the left-side navigation.
You can also create your own custom prompt from scratch to get exactly the information you need. Sparky is here to help you turn your content into actionable reports faster than ever!
Learn more in the full video →
Multiple Ways to Share
Collect content from your customers! You can request more than just a recording. With our Request Stuff/Content feature, your customers can
- Record a video
- Take photos
- Upload an existing photo or video
- Share documents
It’s more flexible and makes it easier for everyone to get the right content into your session or project. No extra apps or steps needed.
For LiveSwitch Users: Want to test it yourself? Just send a request link to your own phone number and experience the same simple upload flow as your customers.
More Tagging Power
In addition to tagging Projects and Sessions, you can also apply up to three tags to videos, images and documents.
You can also now add a tag to your web forms. When a form is submitted and a new session is created, all of the content—photos and videos—will be automatically tagged, saving you a ton of time.
Smarter Search
Our search feature to help you find exactly what you need, fast. You can search across all your content and use powerful filters to narrow down your results. Find what you’re looking for by:
- Date created
- User or contact
- Tags
- Project and session status
Frequently Asked Questions
- Click HERE for help with device permission issues.
- Browsers supported: Chrome, Safari & Edge only.
- To ensure the best performance and security, our software only supports devices and operating systems that are no more than 5 years old. This means:
- Devices (computers, phones, tablets, etc.) must have been released within the last 5 years.
- Operating Systems (OS) must be actively supported by their manufacturer and typically released within the past 5 years.
- We recommend checking the official support pages from your device or OS provider to confirm compatibility:
- Windows OS: Microsoft Lifecycle Policy
- macOS: Apple macOS Support
- iOS/iPadOS: Apple iOS Support
- Android: Android OS versions & support (look for the latest versions supported by your manufacturer)
- If your device or OS is older than 5 years, we cannot guarantee full functionality or provide technical support. Upgrading to a newer device or operating system is recommended for optimal performance and security.
- The Live Conversation & Request Recording links expire after 30 days. If the link is used multiple times the videos will all be stored under the same Session and will be numbered in order for you to scroll through.
- Safeguards for On-Site Recording, if an interruption occurs, your video will automatically stops, saves, and uploads. A pop-up lets you choose I’m done or New recording.
- An email alert will be sent once a recording from a customer is available to view.
- In certain cases, text messages sent through LiveSwitch may not appear in the primary inbox of your messaging application. This is often due to device or carrier-level filtering systems that automatically categorize incoming texts.
To resolve this issue, please:- Review secondary message folders such as Promotions, Spam, or Filtered Messages.
- Note that messages delivered via LiveSwitch integrations may originate from a different number than a standard direct text.
- Confirm that the contact number associated with your LiveSwitch account is accurate and active.
- User Roles: Admin & User
- User Roles can only see their videos and cannot edit Users or Settings.
- Admins have full access to all features and all recordings.
- The Contacts section will be a list of all your contacts you have interacted with via LiveSwitch. Any video sessions with a contact can also be found on the contact record.
- You can share recordings with users that do not have a login to contact for easy collaboration. Use the paperclip icon on the video screen to share from the Session.
- Snapshots can be taken during live calls or while reviewing recordings using the camera snapshot icon.
- Live Call Features:
- Share Screen
- Toolbox: Background Blur, Virtual Background, Laser Pointer & In Call Notes
- Virtual Background
- Adjust playback speed by clicking the three dots in the lower right corner of the video. Speeds up to x2
- Tags can be used to organize or further categorize your sessions. Add them as you go or apply in settings.
- Videos are stored forever unless deleted.
- More Actions on the session page options include:
- Copy Session Link
- Resend Invite
- Rejoin Session
- Delete Session
- How to Reset your Password:
- Visit app.contact.liveswitch.com
- Enter your registered email ID as the username
- Follow the prompt to send a password reset email
- Open the LiveSwitch Support email and click the reset link
- Set a new password
- Log in using your email ID and the new password
Note: If you signed up or usually log in using Google Single Sign-On, you won’t be able to reset your password through LiveSwitch. Instead, you’ll need to reset your Google account password directly.
- Password Requirements:
- At least 8 characters
- At least 3 of the following:
- Lower case letters (a-z)
- Upper case letters (A-Z)
- Numbers (0-9)
- Special characters (e.g. !@#$%^&*)
- Session Statuses:
- Sent – Text was successfully sent to the customer.
- Scheduled – Live session has been scheduled.
- In Progress – Customer opened the text and clicked the link.
- Processing- Customer is using link to take video and video will be processed once they complete recording
- Ready for Review – Email notification has been sent to you that video is ready to view and the recording is in your account.
- Reviewed – You or someone has reviewed the session.
- Project Roles:
- Editor can add content, remove content, and update project details.
- Viewer can view content but they cannot add or remove content or see project details.
- Deleting a User and Reassigning Sessions: When a user is deleted, their sessions and notifications should be reassigned to another active user or admin.
- Click on the dropdown toggle and select Users to access the user management section
- Location the user you wish to remove and click Delete next to thier username.
- A dropdown will appear prompting you to select a repalcement user.
- Choose the appropriate user or admin who will take over the deleted user’s sessions and notifications.
- Confirm the deletion.
Adding Shortcuts
At LiveSwitch, we believe simple is better, so there is nothing to download and no apps to install. For quick and easy access, follow the below instructions to add a shortcut to your computer or mobile device.
Desktop Shortcut
- Open your browser (Chrome, FireFox, Internet Explorer or Safari)
- Type in app.contact.liveswitch.com in the URL address field
- Click on the lockbox or globe icon next to the URL and hold it down while dragging it over to your desktop then drop it where you want it to appear
iPhone Shortcut
- Open the Safari App
- Type in app.contact.liveswitch.com in the search field and click Go
- Once the LiveSwitch site appears click on the share icon

- Select Add to Home Screen then Add
- Close out of the Safari app and you should see a new app icon for LiveSwitch on your phone as an app shortcut
Android Shortcut
- Open browser and type in app.contact.liveswitch.com
- Click the three dots to the right of the URL and select Add to Home Screen then Add two times
- Close out of the internet browser and you will see the LiveSwitch Icon on your phone screen as an app shortcut
Support
The LiveSwitch Customer Success Team is here to help. Please contact us with any questions, feedback or if you need a quick refresher training. Support is available 24/7 with the exception of major holidays.
For support, questions, or consulting: help@liveswitch.com
For billing or account management: accounts@liveswitch.com
Phone: 844-587-9824
Schedule 1:1 Time with Customer Success
Integrations
Integration Guides & API Information